Introduction
I had the idea to transform the original USB/serial command Pi PICO based module into an ESPHOME based module.
With the help on CHATGPT i ported the original c-code program into an ESPHOME external component and needed YAML file.
The RP2040 Pi Pico module also needs to be replaced by a PI Pico RP2040 W version. It has the same pinout as the Original Pi PICO RP2040, so no new PCB needed to be created. ESPHOME requests a wireless RP2040 Pi PICO, so i used the RP2040W (Pi Pico RP2040W) for easy porting.
As explained a few day ago i now publish the final ESPHOME version. See below preview of Hamulight_L2046_RP2040W_PCB

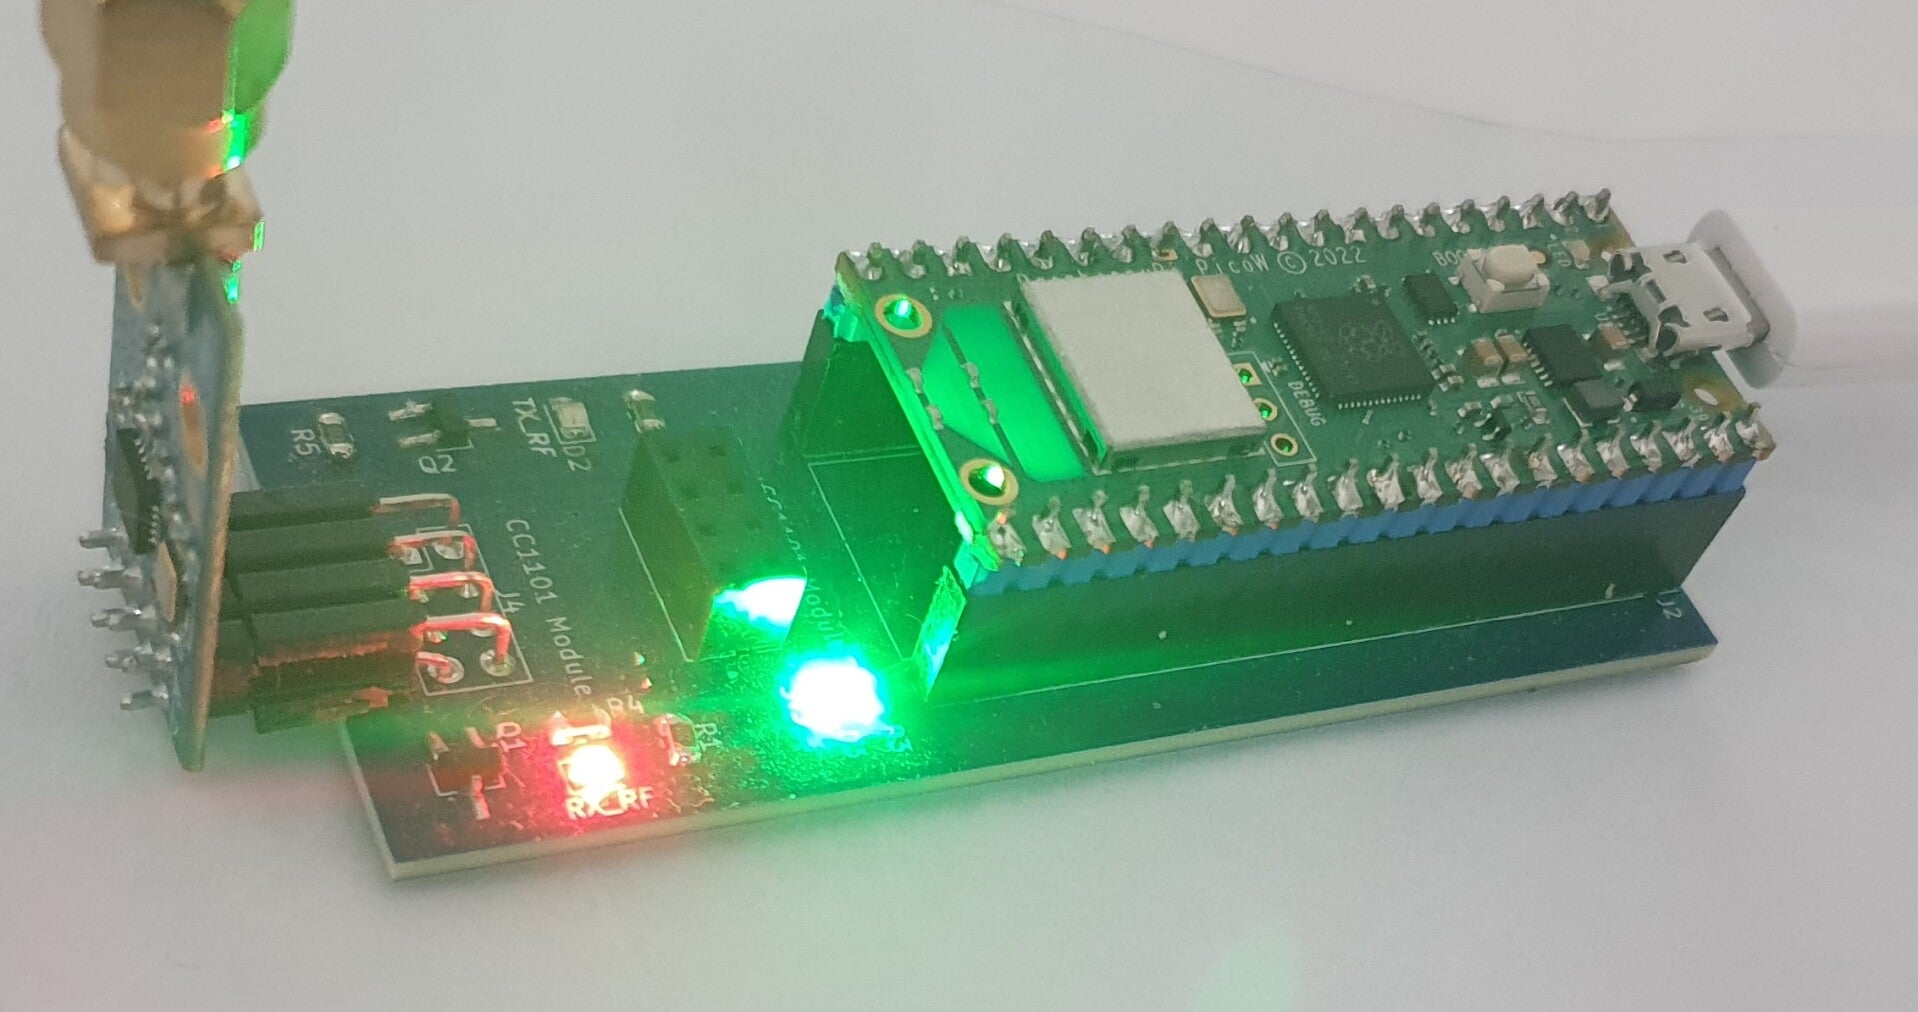
Below the ESPHOME files, including YAML file in a .ZIP file to download for you. Also the PCB gerberfiles, schematic and casing STL files are free to
download for you.
The COMPONENTS folder in the below .ZIP file needs to be copied to your HomeAssistant device in the folder /config/esphome/
Please vote. What do you think about this module
The contents of the .YAML file needs to be added to your YAML file in HomeAssistant.
If all files are copied to your HomeAssistant folder /config/esphome a folder will appear in config/esphome/ with the name components.
esphome
├── components
│ └── hamulight
│ ├── __init__.py
│ ├── cc1101.cpp
│ ├── cc1101.h
│ ├── component.py
│ ├── hamulight.cpp
│ ├── hamulight.h
│ ├── learn.cpp
│ ├── learn.h
│ ├── receiver.cpp
│ ├── receiver.h
│ ├── storage.cpp
│ ├── storage.h
│ ├── transmitter.cpp
│ └── transmitter.h
When all copied and .YAML file edit is done press the install button located at top right of your screen.
The next option is manual download, UF2 file (NOT OTA).
The needed .UF2 file, for first install, will be created and downloaded into your windows download folder.
Press and hold the BOOT button on your PI PICO RP2040W and connect it to a USB port of your windows computer. Now release the BOOT button and a drive in windows will appear with the name RPI_RP2.
Now copy your created .UF2 file to this drive and your set to go.
Your RP2040W will boot and connects to your WIFI, with the credentials used in your .YAML file. When your RP2040W is connected to your WIFI it will present itself in HomeAssistant. Add the device (settings menu -> Devices and Services).
On the top of this screen in HomeAssistant you will see Discovered Device(s).
Add your new discovered Hamulight Bridge to ESPHOME.
Now your Hamulight Bridge will be known within HomeAssistant.

First step after the device is known in ESPHOME you need to learn your Hamulight L2046 original remote control TO the Hamulight Bridge.
In Settings -> Devices and services - > ESPHOME you should double click on the Hamulight Bridge. This will show all possible buttons and sensors. Find the learn Button and press it. The Hamight Bridge will go, for 10 seconds, in learning mode. Also a learn LED will lightup to indicate LEARN remote is active.
Within 10 seconds press the ON/OFF button of your original Hamulight L2046 remote control. In the sensor field you can see remote serial and remote data.
After first flash the remote serial is A7E4 and remote data is 0000. After learn this will change in your remote serial and remote data.
Now try to press the ON or OFF button in ESPHOME window on your windows computer and your Hamulight Bridge will switch ON and OFF your lights.
One remark: The ON and OFF codes send by the Hamulight Bridge will be the same. This is the same as on the original remote controll.
THE WRITTEN CODE IS CREATED BY CHATGPT. IT IS A PORT FROM MY ORIGINAL SERIAL COMMAND MODULE (ALSO ON THIS WESITE). FOR THE MOST STABLE VERSION OF MODULE PLEASE USE THE USB/SERIAL COMMAND MODULE.
THE ESPHOME VERSION NEEDS PROBABLY MORE MAINTENANCE AS ESPHOME VERSIONS MAY CHANGE AND API'S MAY CHANGE.
I'M NOT A PROGRAMMER, BUT AN ELECTRONICS ENTHOUSIAST. PLEASE DO NOT BLAME ME IF AFTER HOMEASSISTANT AND/OR ESPHOME UPDATES THE MODULE DOES NOT WORK ANYMORE.
THIS PROJECT WAS A TRYOUT AND PRESTIGE IF I COULD MANAGE TO GET THE HAMUBRIDGE WORKING WITH ESPHOME AND HOMEASSISTANT. I WILL NOT BE RELIABLE FOR ANY DAMAGES WHEN YOU USE THIS DESIGN.